How to connect HeyReach & Trigify for smarter LinkedIn outreach
How to connect HeyReach & Trigify for smarter LinkedIn outreach
If you watched our recent webinar with Steven Brady, you know this isn’t just another hype-filled tech stack. Steven walked us through the actual setup that helped him generate $49,000 in 8 weeks. No shady scraping, burning accounts, or blasting cold messages.
It’s smart, safe, and surprisingly easy to replicate once you understand how it all fits together.
So here’s a complete breakdown of how to technically connect HeyReach and Trigify.io, stay within safe LinkedIn limits, and how to start your first campaign from scratch.
The building blocks: What’s what?!
Let’s break down what each tool does:
- HeyReach – This is your main automation engine. It handles sending connection requests, managing follow-ups, and making sure everything runs in sync across multiple LinkedIn accounts. It's cloud-based and built with safety at the core.
- Trigify – Its core functionality lies in reacting in real time. Trigify listens for actions and triggers based on LinkedIn activity and other social signals. It automates follow-ups based on things like a user accepting a connection, liking a post, or replying to a message. Think of it as your “if this, then that” engine.
Now that we know the basics, let’s move to the process. 👇
Step 1: Use the right kind of LinkedIn Account (and why it matters)
You can connect any type of LinkedIn account with HeyReach and Trigify. Yet, have in mind that you’ll have best results with Sales Navigator, as you’ll have more options within LinkedIn itself.
🛠️ To connect your LinkedIn account with HeyReach you can follow this step-by-step guide or just watch the video bellow:
🛠️ If you’re starting out with Trigify follow this video on setting up account and setting tracking of social signals on LinkedIn:
Here’s a key thing Steven emphasized: Trigify doesn’t use your LinkedIn account for scraping, which is a big deal.
He pointed out that the biggest asset LinkedIn owns is its data.
So using your personal LinkedIn account (like some AI tools do) gets risky fast. That’s where Trigify shines. It sidesteps that issue by operating differently under the hood, keeping your account safe.
And HeyReach? It operates using session cookies, but with built-in limits and proxy protection that actually make it safe to run multiple accounts without tripping alarms.
In Steven’s own words:
“You can’t go in here and just sort of blast and spam… the product limitations tell me you guys are thinking about keeping users safe from themselves.”
With real-time data syncing between these 2 platforms, you can be sure your campaigns are always using the most up-to-date information.
💡 Pro tip: Don’t just add your own account. You can connect multiple accounts in HeyReach safely because of how it manages proxy rotation and smart limits. Check the article on Multiple LinkedIn senders on one campaign (Sender rotation) for step by step guidance.
Step 2: Integrate HeyReach and Trigify
Go to HeyReach dashboard and search for the Integration tab, scroll to find the HeyReach API.
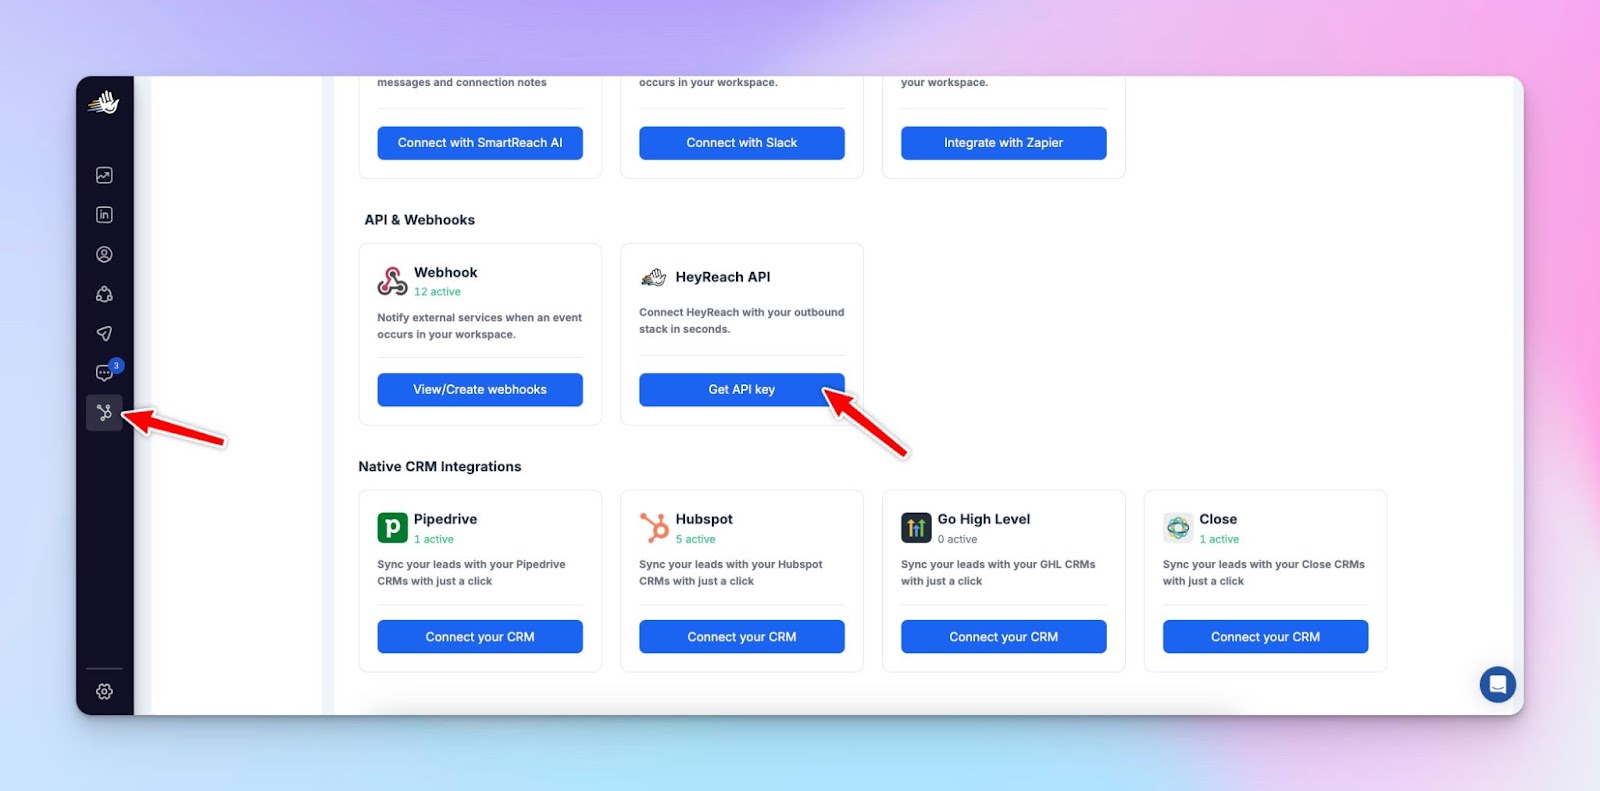
Click on Get API key and copy it.
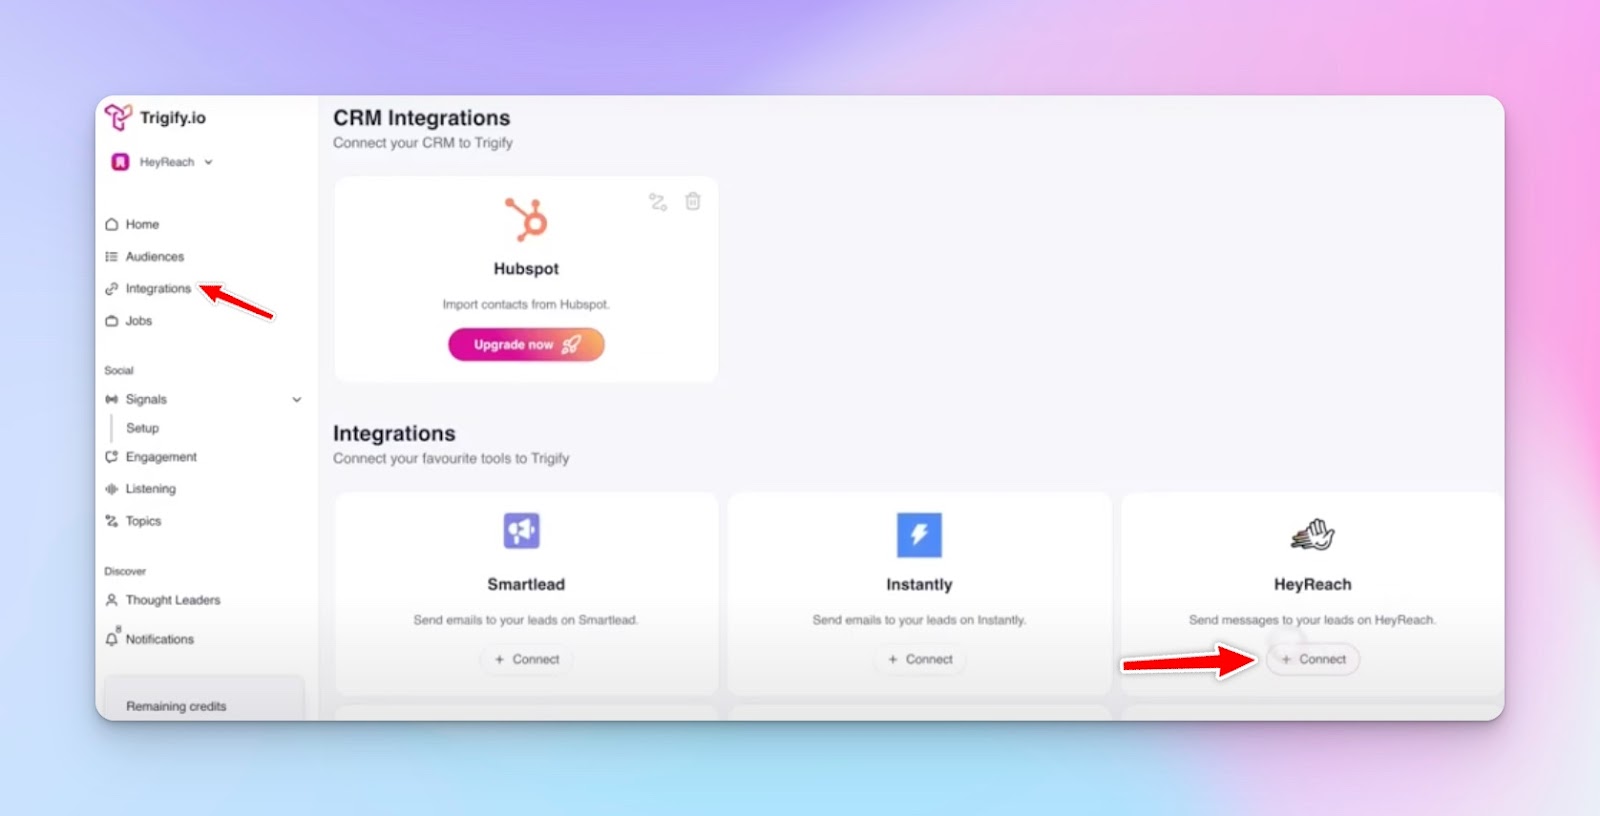
Now, open your Trigify dashboard, and go over to the Integration tab - it’s located on the left bar.
Find HeyReach integration, and click Connect.
Paste your HeyReach API key. Confirm.
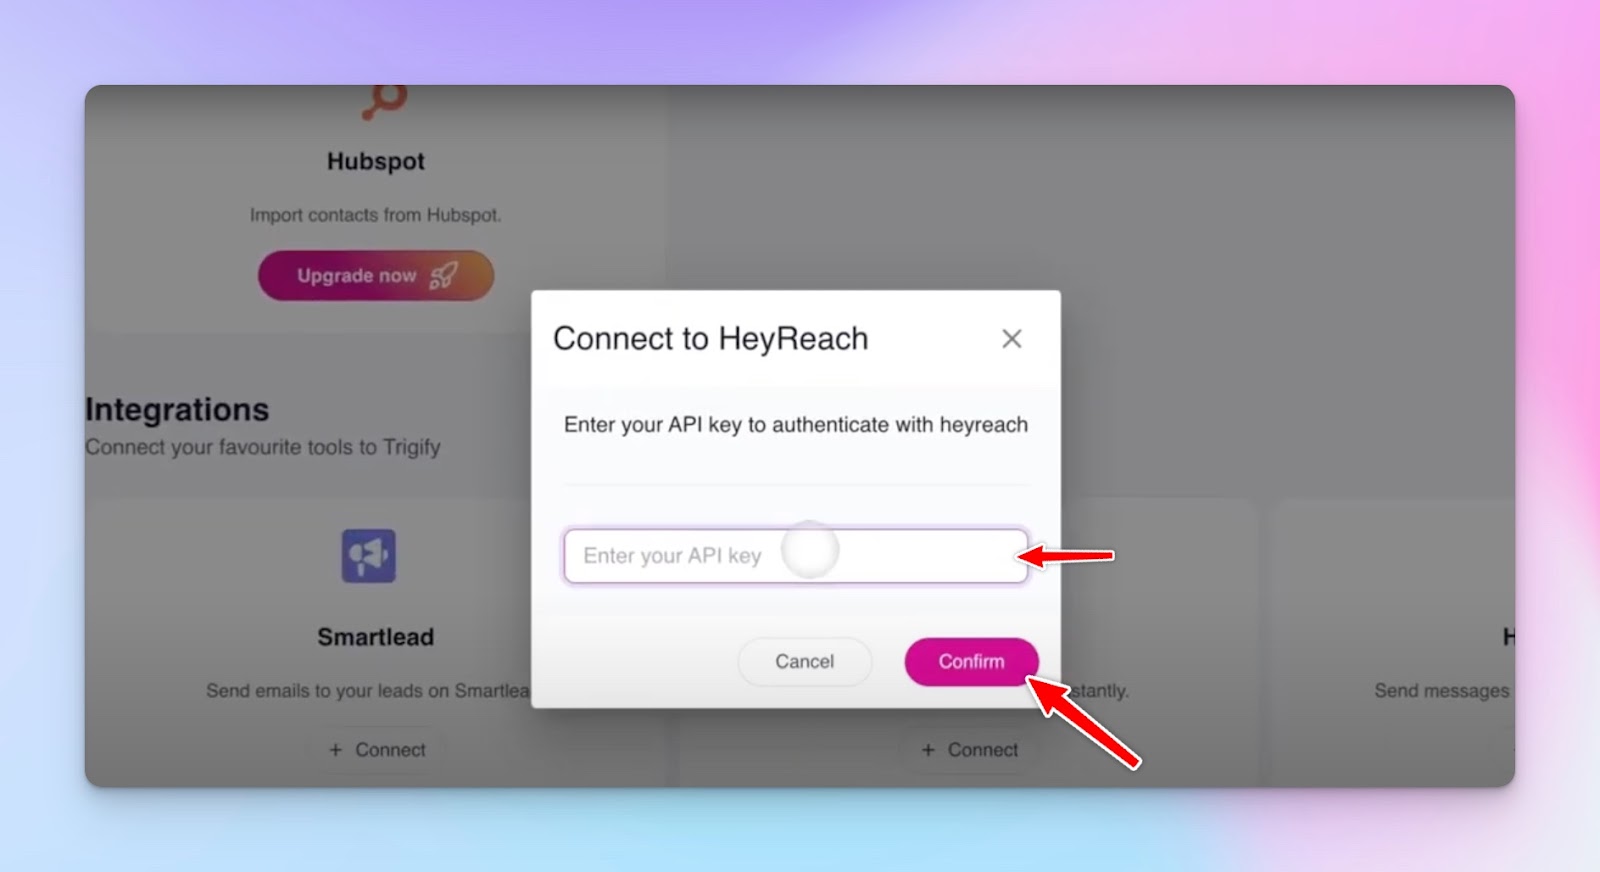
That’s it, you’ve integrated HeyReach and Trigify! 🎉
Step 3: Create a trigger in Trigify
It’s time to build a workflow in Trigify (sync with your CRM for better lead management):
- Log in to Trigify and go to the “Workflows” section.
- Choose an action trigger — for example:
→ "Connection accepted"
→ "User replied"
→ "Lead engaged with a LinkedIn post" - Now define what Trigify should do when that event happens.
For example:
→ When a lead accepts a connection request, trigger a HeyReach follow-up.
→ If a lead likes your post, send a friendly DM or connection request.
Let’s say you send out 200 requests, and 50 accept… now Trigify sees that, and can automatically follow up only with those 50.
That’s where real personalization begins.
👉🏻 For a step by step guide on how to set up social signals you want to track with Trigify please visit their article collection Social Signals.
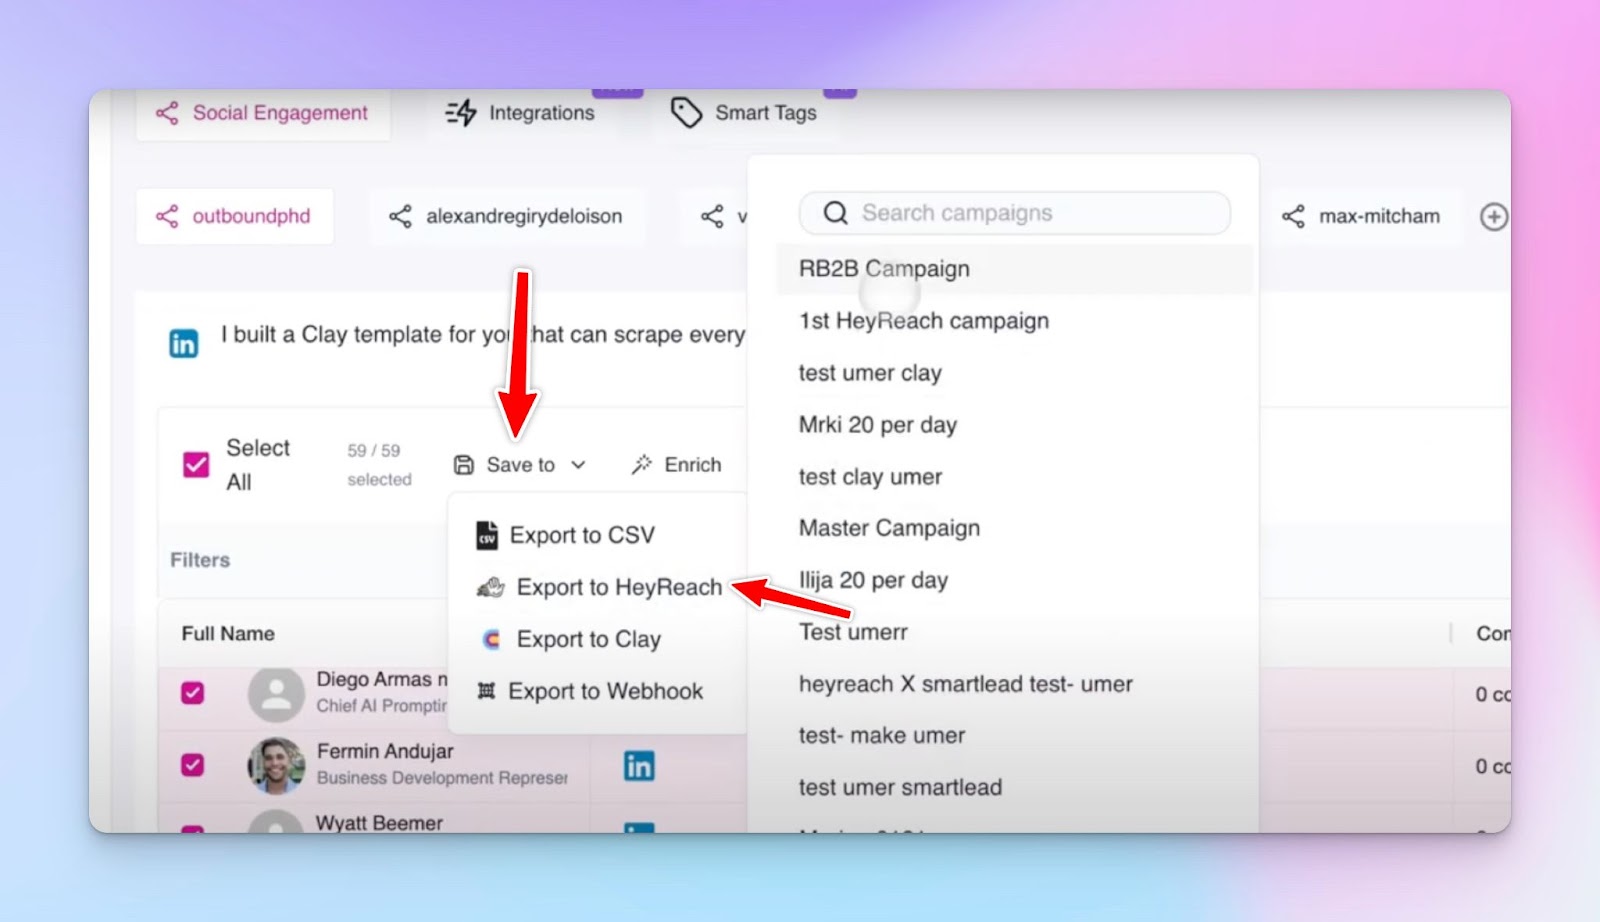
Once you’ve set up everything you need, you can export your leads directly to HeyReach by clicking on the Save to tab in Trigify dashboard
Choose Export to HeyReach from the dropdown menu, and choose a specific campaign you want to export to. But before you click that Export button, let’s just create a campaign in HeyReach really quick.
Step 4: Launching the campaign in HeyReach
Once you’ve got Trigify listening for the right social media triggers, it’s time to start the actual campaign.
Here’s the rundown:
1. Create a new campaign in HeyReach. Name it based on your target (e.g. “Trigify - Founders in B2B SaaS – April”)

2. Choose the LinkedIn accounts you’ll run the campaign through. You can rotate across several accounts to increase volume and stay under the radar.
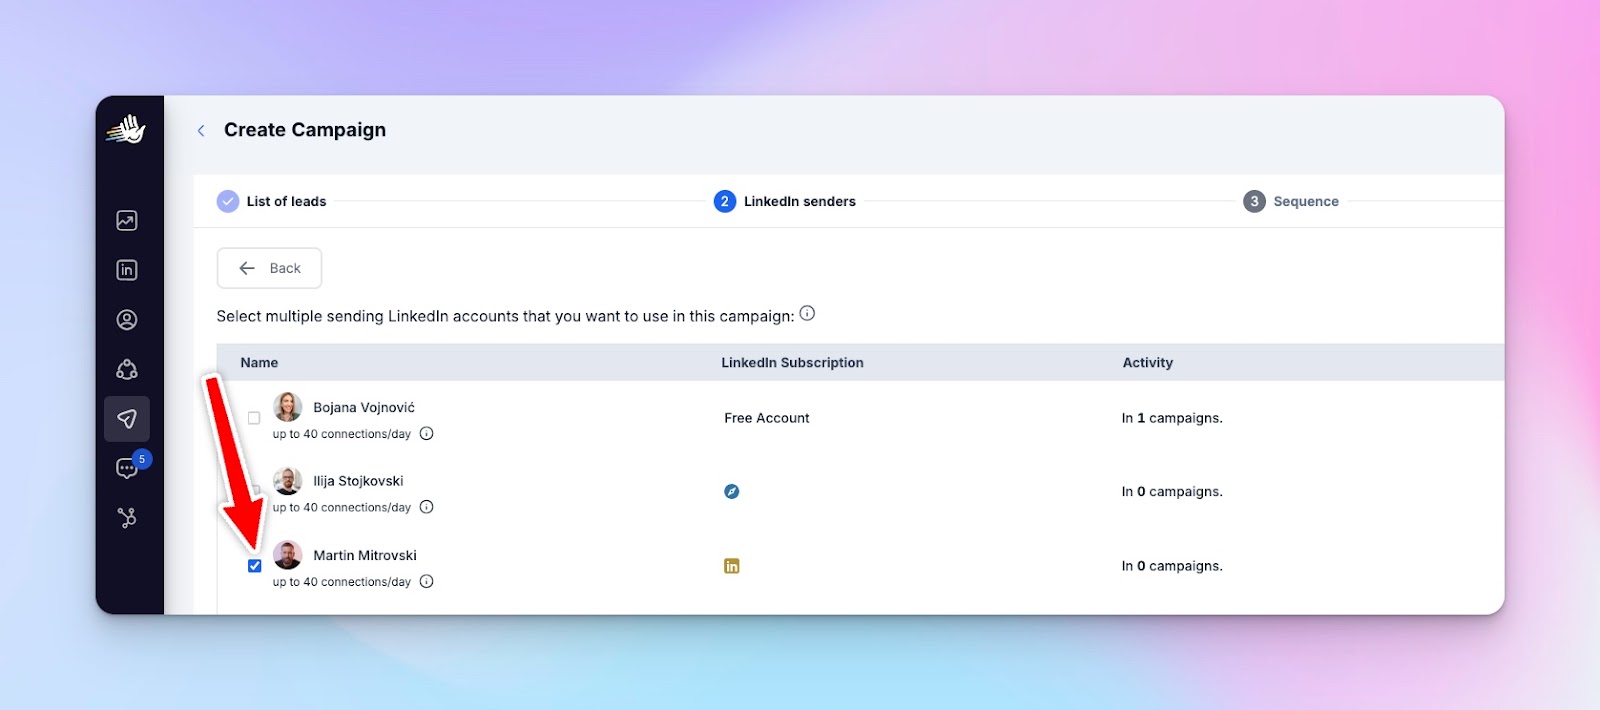
Getting started is simple: Sign into your HeyReach dashboard → Go to the LinkedIn Accounts section and click Connect Account → Log in with your LinkedIn details.
3. Use Clay for lead enrichment before uploading, adding key data points like company size, industry, or recent posts.
🛠️ To connect Clay, go to Integrations > HeyReach API > get your API key, and paste it into the API key box in Clay.
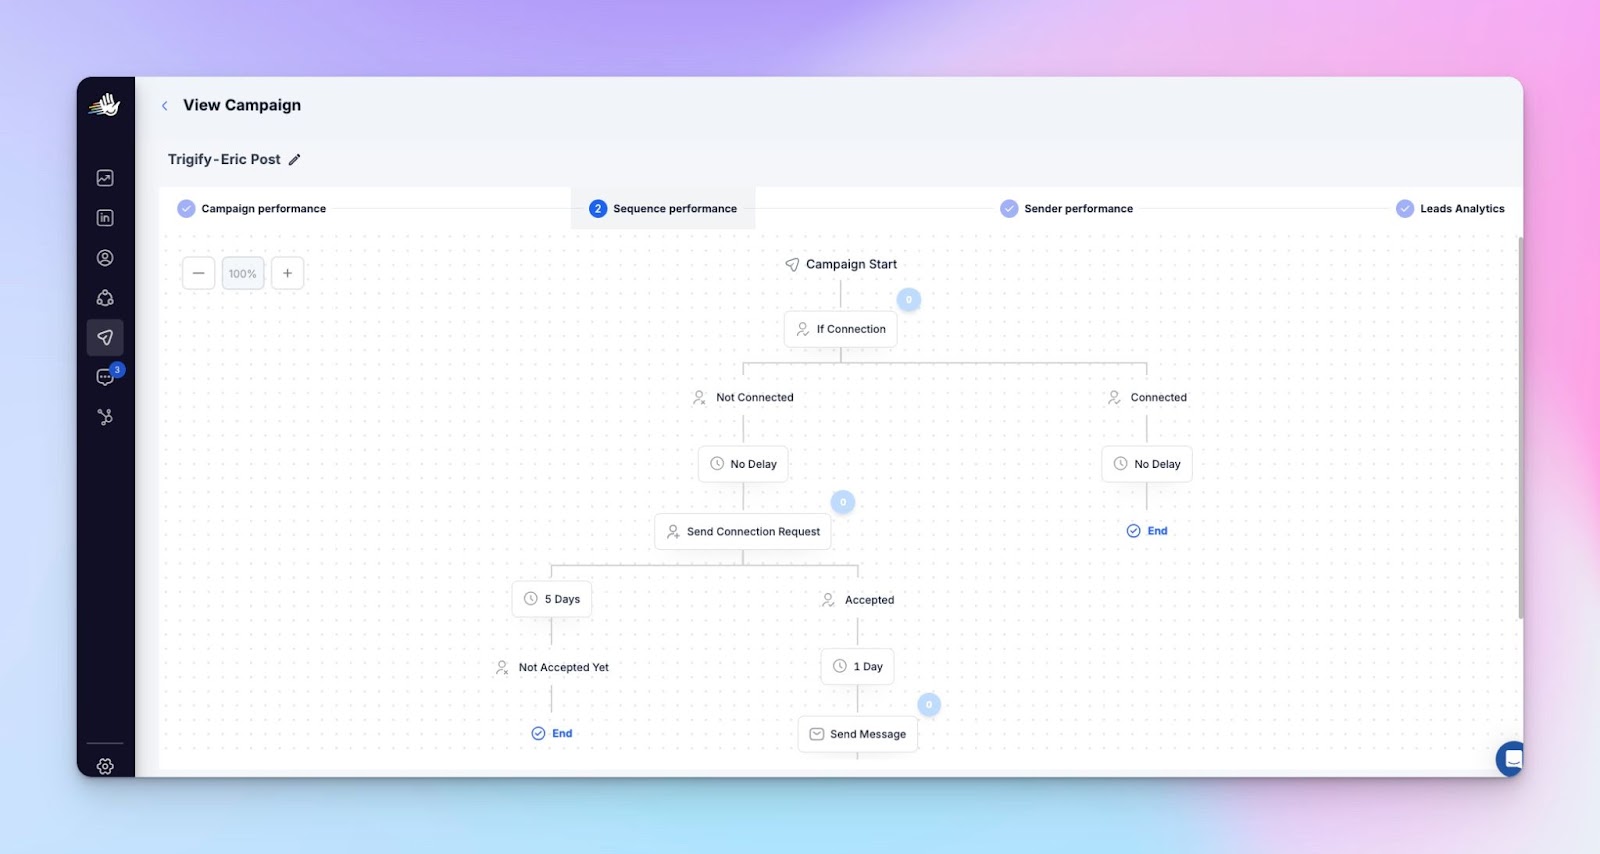
4. Write your sequence – this is where HeyReach does its magical thing.
You set up a series of messages that go out automatically, so you’re not chasing people down one by one. A simple setup might look like this:
- Connection request – Kick things off with a quick, friendly note when you send the invite. Nothing salesy, just a good reason to connect.
- Follow-up #1 (1 day later) – Once they accept, HeyReach automatically sends a message the next day. Think of it as a casual intro or something that adds a bit of value.
- Follow-up #2 (3 days later) – Still no reply? Send a second nudge a few days later.
Pro tip: Trigger a follow up #2 message only if the person engages on LinkedIn (Trigify handles that and shares social data with you)
Step 5: Sync Trigify with HeyReach
Now for the fun part — connecting the dots. You can go back to Trigify, and export leads to the HeyReach campaign you created.
Here’s how this integration operates in practice:
- When Trigify detects a connection was accepted, it sends a signal to HeyReach to trigger message #1.
- If Trigify sees engagement (a like, comment, or profile visit), it can trigger a tailored message #2 as well.
- You can build this into the HeyReach sequence using conditional logic and branching.
Scaling it (safely)
This whole system is built to scale. You can:
- Run multiple LinkedIn accounts through HeyReach (great for distributed agencies, sales teams and GTM experts)
- Track individual trigger performance via Trigify dashboards
- Add or rotate fresh lead lists daily using data providers like Clay or CSV imports
And of course, always keep your outreach human and relevant by responding to signals, not just timelines.
Final thoughts
And that’s it! This way, Steven built a repeatable, smart system using HeyReach and Trigify that actually closes deals.
If you want to:
- Build outreach that feels authentic
- Follow up based on actual social engagement
- Avoid burning accounts with unsafe tools
…then this is the stack to start with. I dare to say it’s one of the most efficient lead generation flows I’ve tested so far.
Best part? You can try the entire flow without spending a dime. If it works (and it probably will), great. If not, both platforms offer extended trials if you need more time.
Want a guided walkthrough or to see how it fits your workflow? Schedule a 1 on 1 strategic call with our team!
.png)
Build and scale your first LinkedIn outreach campaign for free - no card required