How to use LinkedIn Sales Navigator for sales
Published:
March 20, 2024
, Updated:
May 19, 2026
LinkedIn Sales Navigator is one of the most powerful tools in B2B sales if you want to tap into a network of over a billion professionals.
But let’s skip the obvious — you already know what it is and where the search bar lives.
What matters is how you actually use LinkedIn Sales Navigator to generate leads, consistently find the right accounts, surface high-intent prospects, and turn LinkedIn into something huge for you.
How to use LinkedIn Sales Navigator for lead generation
The following tried-and-true seven tactics work like a charm. Both we at HeyReach and our users have tested them out and got some amazing results.
We shared more in depth on specific cases in following articles:
1. LinkedIn message automation playbook [42% RR example]
2. LinkedIn cold message template that got 40+ replies
3. LinkedIn outreach templates from our users
To make sure you can replicate this success, we’ll break down each tactic into actionable steps.
1. Target only the most active LinkedIn members
Targeting people who regularly share content, engage in conversations with other members, and contribute to discussions on the platform is an excellent tactic for generating leads.
You can expect higher response rates and more meaningful interactions since active users already value LinkedIn as a networking tool and are making the most of it.
Most of them are not viewing LinkedIn like just another social media platform to share nice pictures, but are actually involved in social selling themselves.
When trying to attract the attention of LinkedIn’s most active members, the “Posted on LinkedIn” filter becomes your best friend.
Here’s how to leverage it like a pro:
- Apply the “Posted on LinkedIn” filter. This will narrow down your results to members who have posted on LinkedIn in the last 30 days. You can track them through their recent activities and enrich your leads with these saved searches.
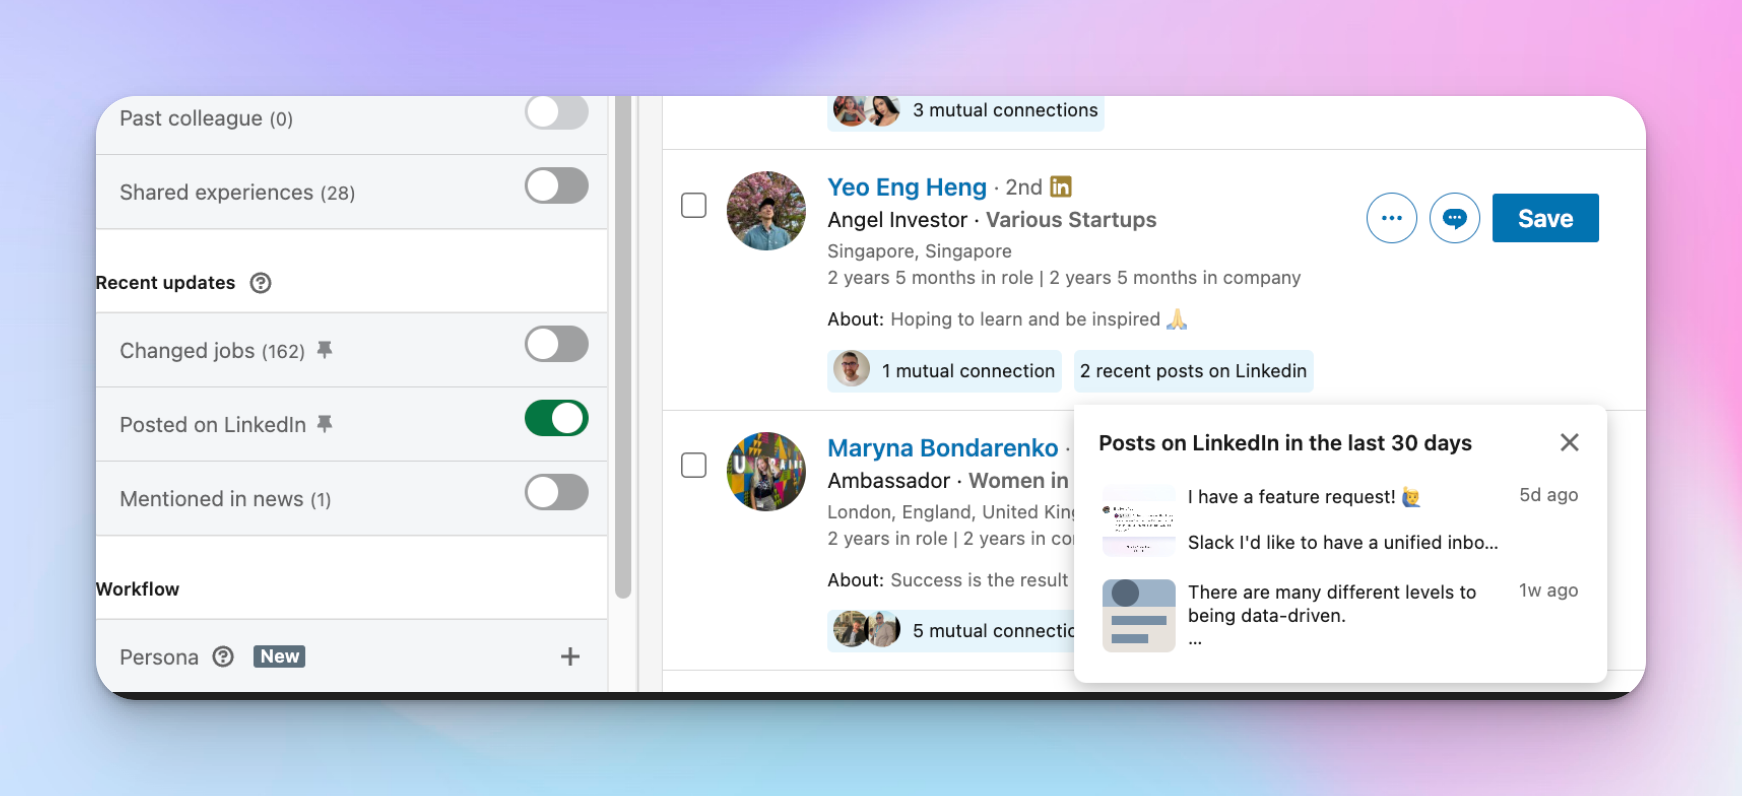
- Reach out to people who posted something recently. Once you have a list of active users, you can begin your outreach. To break the ice, click on the post you find interesting, hit the like button, and share your two cents about it in the comments section. Then you can strike up a conversation with the potential lead by sending a personalized message and using their recent post as a talking point
Bonus tips
- Offer value
Don’t just say, “Your recent post about your recent project was interesting. I’d like to have a chat about it.”
This is too generic and shows a lack of genuine engagement.
A better approach would be, “Your post about your recent project on renewable energy solutions caught my eye. I was particularly impressed by the innovative approach you took to solve the grid stability issue. In my own work, I’ve explored similar challenges and found some strategies that might complement your findings. Would you be open to a conversation about this?”
This specific and thoughtful message not only shows that you have actually read and understood their post but also positions you as an expert and someone who can add value to the conversation.
You can also share an insightful article related to their post, offer solutions to a problem they mentioned, or provide your unique take on things.
- Follow up
Sometimes you’ll get crickets, but don’t give up just yet. If you don't receive a response right away, come up with a follow-up message that offers some additional insights. Be persistent, but know when to call it quits.
- Use a “pull” strategy for featured content on LinkedIn
Instead of attaching brochures or decks (which often trigger spam filters), upload your resources like case studies or whitepapers to the Featured section of your LinkedIn profile. Then simply point prospects there in your message.
Before publishing, you can quickly update and tailor your PDFs using tools like PDFAid to match your campaign. This keeps your content relevant and lets prospects engage with it on their own terms, without feeling pushed.
Why this strategy works:
Instead of sending canned, generic messages to a bunch of potential leads and casting a wide net, prioritize quality over quantity.
It’s only logical that you’ll have more chances of getting a response and possibly building rapport with your prospects when they see that you’ve taken the time to understand what matters to them.
2. Use the “Connections of” Filter for Strategic Networking
LinkedIn Sales Navigator’s “Connections of” filter is a game-changer in your quest for targeted leads. It works best for exploring the networks of your current clients or competitors' connections. Some of them can even end up as warm introductions, if you have the good connections that have good connections. :)
Result? A surefire way to boost your chances of finding potential customers who are already interested in your products or services.
Here's how to use Sales Navigator’s “Connections of” filter for LinkedIn prospecting.
Step #1: Identify your clients or competitors
Begin by running a search for your existing clients or competitors. Use filters like company name, industry, or specific job titles to narrow your search results accurately. This step lays the foundation for identifying valuable networks you can tap into.
Step #2: Unearth their connections
Once you generate a list of desired contacts, access the “Best path in” search and scroll to the “Connections of” section. Here, select the 1st connection whose connections you would like to view. This simple action will reveal profiles of people from your clients’ networks, opening up new avenues for potential business opportunities.
Step #3: Segment by job titles
To further refine your search, use the “Job Title” filter. Input job titles that align with your target audience, such as “Marketing Manager,” “Sales Director,” or “CEO.” This segmentation will allow you to focus your efforts on decision-makers and key stakeholders who have the authority to greenlight deals.
Why this strategy works:
Using the “Connections of” filter piggybacks on existing networks of clients and competitors who are already within your industry’s ecosystem.
You practically leverage established relationships, creating a sense of trust and familiarity that cold outreach lacks. When you connect through a mutual connection, prospects are more likely to view your interaction positively, considering it as a vetted introduction rather than an unsolicited approach.
3. Target Prospects Who Recently Changed Jobs
Starting a new job is both exciting and stressful.
Professionals recently transitioning to new roles are more open to new opportunities, tools, or services to help them navigate their new positions. So, identifying and targeting them is a super smart move.
That’s where the “Changed Jobs” filter within LinkedIn Sales Navigator comes into play.
Here’s how you can make the most out of this approach:
- Apply the “Changed Jobs” filter. This filter spotlights people who have updated their profiles with new job positions within the last 90 days. This transition period is often when new needs and opportunities arise, making it an ideal moment to reach out with empathy and present yourself as a valuable resource.
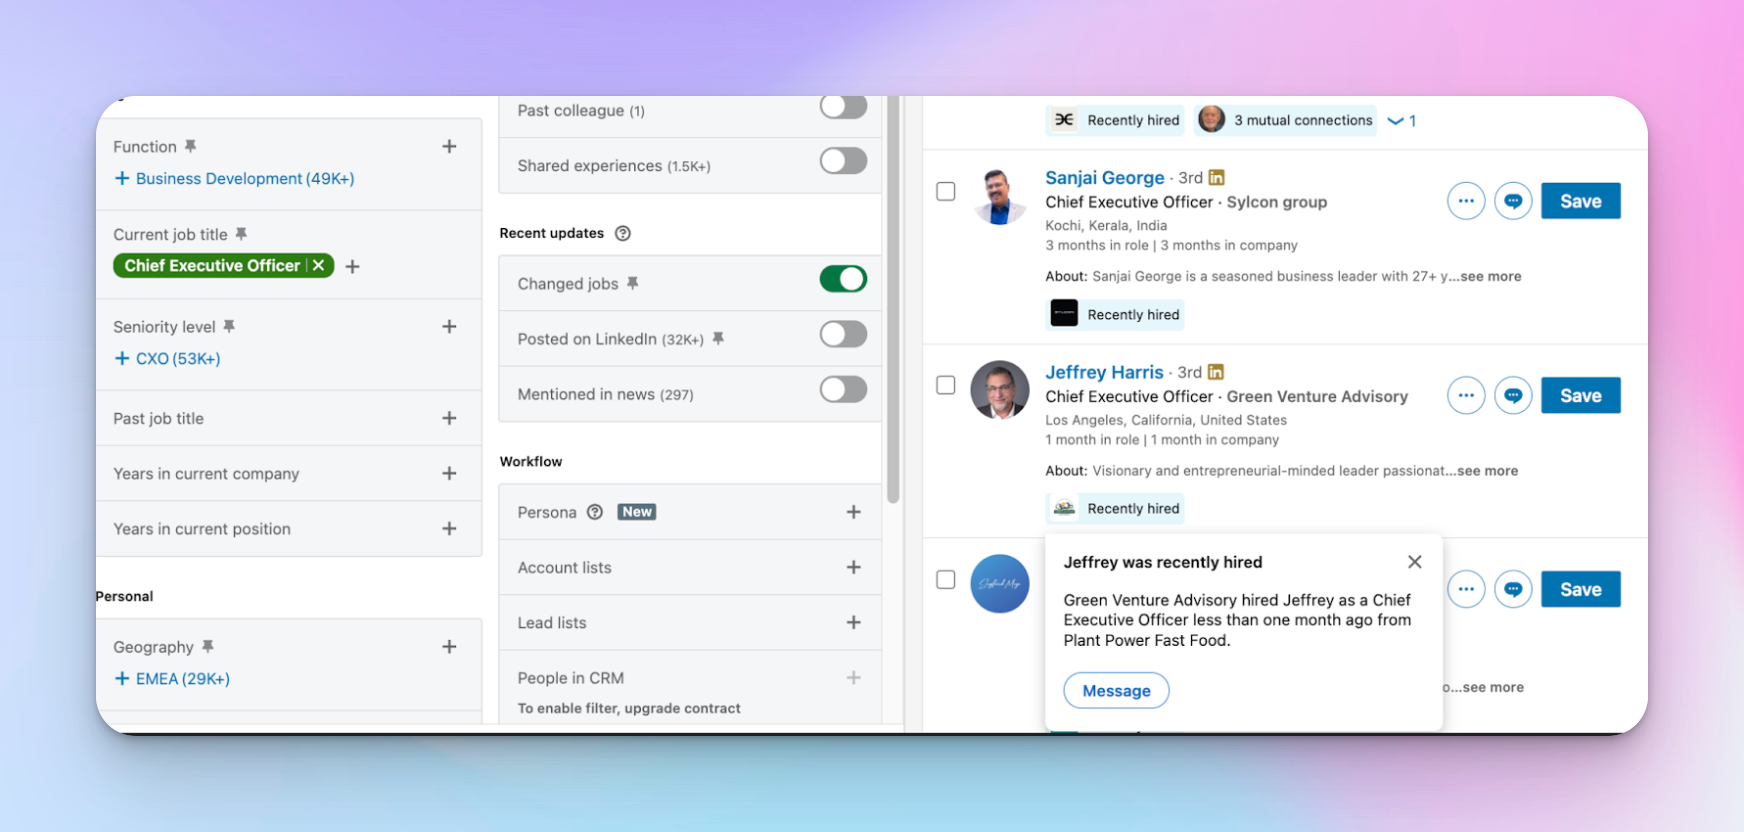
- Refine your search. Use the Job title or Location filters to make sure your outreach is as relevant and targeted as possible. Segmenting the results by specific job titles relevant to your product or service will allow you to get in touch with decision-makers since they are most likely to be in the market for new solutions as they start their tenure. Adding the Location filter is particularly useful if your product or service is region-specific or you want to build a network in a particular area.
- Craft a personalized message acknowledging their recent job change. Put the data you collected to good use and create a tailored message that will serve as a natural and engaging conversation starter.
Check out our cold message templates, or customize the one below::
“Congratulations on your new role as [Job Title] at [Company]! Transitioning to a new position brings exciting challenges and opportunities. I’ve been following [Prospect’s New Company] for a while and noticed you might benefit from [Your Product/Service]. It’s designed to help with [Specific Challenge]. I’d love to discuss how it could support your goals in your new role if you're open to it. Best wishes in your new venture!”
Why this strategy works:
By reaching out with a personalized, supportive message, you’re not only offering value but also establishing a connection at a potentially pivotal moment in their career. This method helps you build genuine connections, setting the stage for meaningful professional relationships.
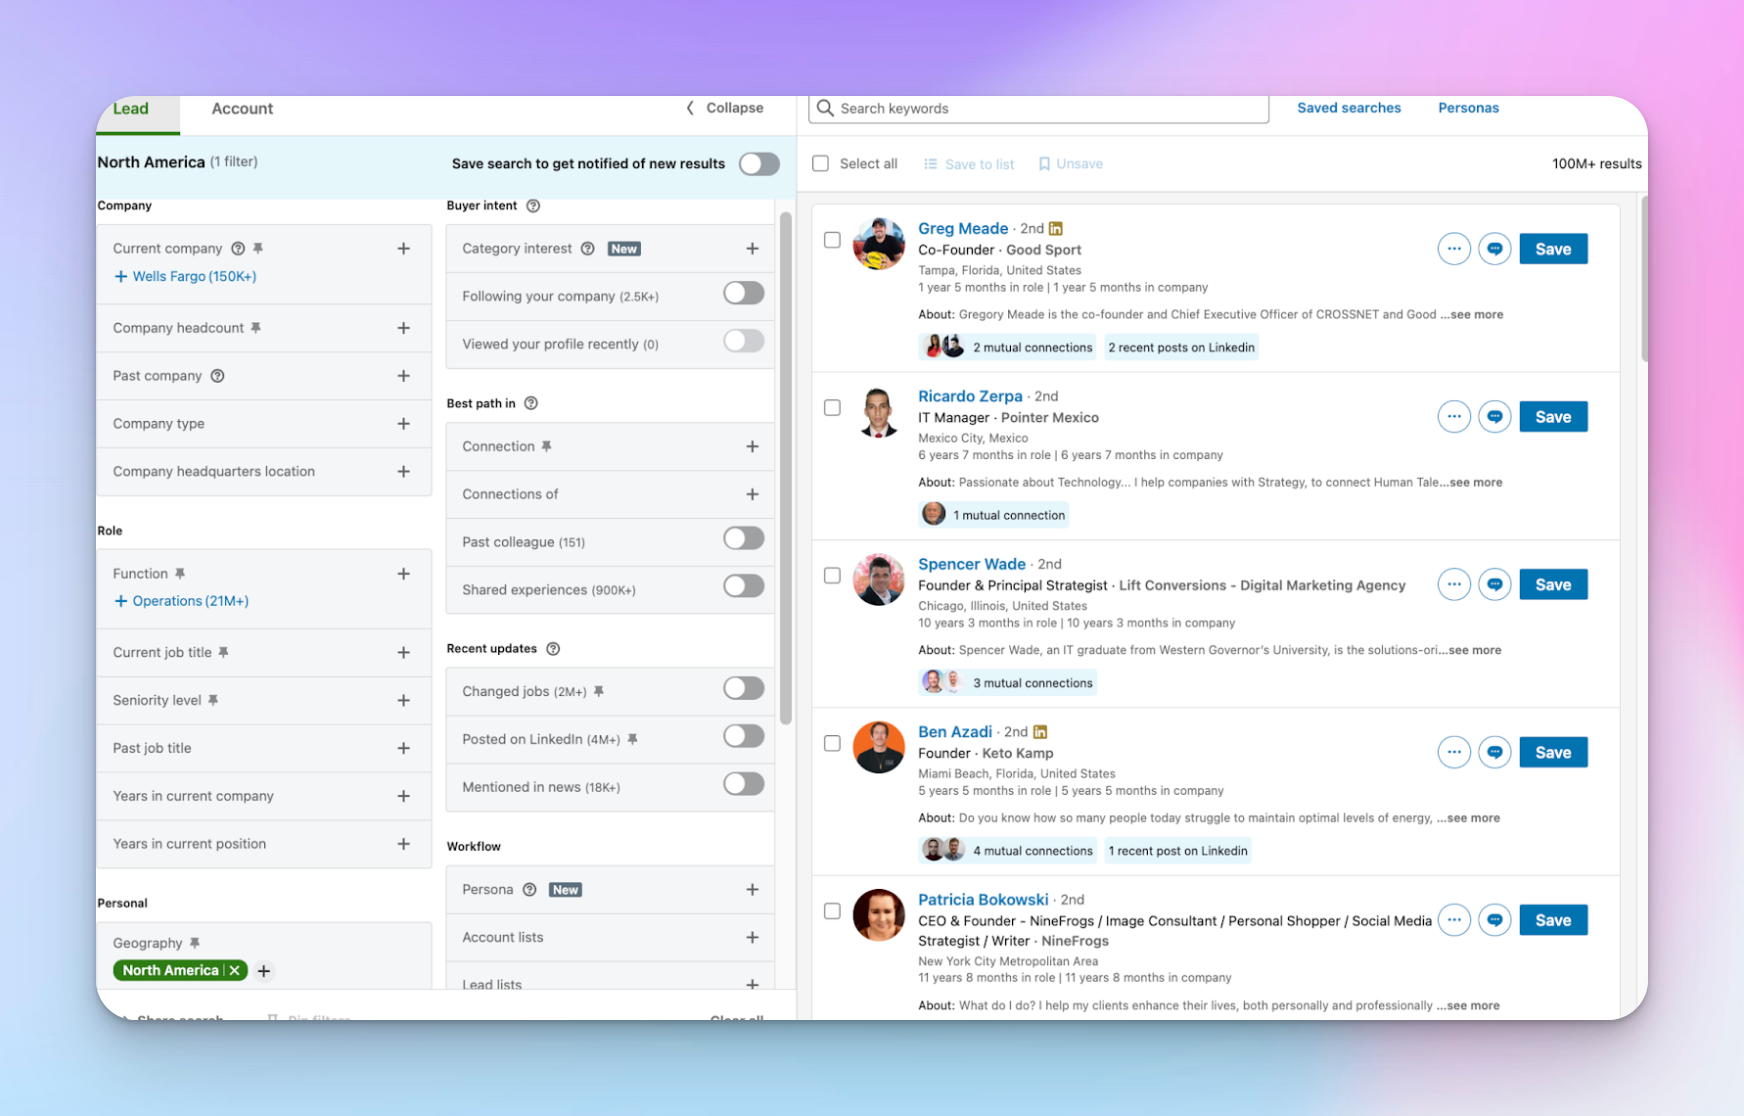
4. Use Boolean Strings for Search Precision in Sales Navigator
A Boolean search in LinkedIn Sales Navigator is a method that allows users to create more refined and targeted search queries by combining keywords with operators such as AND, OR, NOT (also represented as AND NOT in LinkedIn), parentheses (), and quotation marks "".
To make your searches more precise, use Boolean search strings. This method works best when paired with the “Current Job Title” filter.
Here’s how to use LinkedIn Sales Navigator’s Boolean operators AND, NOT, & OR to run searches that return highly targeted results. This kind of search works in the job, company, and keyword fields.
How to build a Boolean Search String?
Start with the job title. Identify the job title most relevant to your target audience. For example, if you're targeting marketing professionals, your base search term might be "Marketing Manager."
Exclude unwanted terms. Use the NOT operator to exclude profiles that may not be relevant to your search. For example, add “NOT Intern” to focus only on experienced professionals.
Expand your search. The OR operator allows you to include a broader range of relevant titles. For example, including “OR Director” will broaden your search to higher-level positions within the marketing domain.
Combine terms for better precision. Your final Boolean search string should look like this: (“Marketing Manager” AND NOT Intern ) OR Director. This string will narrow down your search results to your target audience.
Once you’ve created your Boolean search string, apply it using the “Current Job Title” filter.
The beauty of using Boolean strings in LinkedIn Sales Navigator is running exceptionally targeted searches. With this approach, your LinkedIn prospecting is directed towards people who precisely fit your ideal customer profile, which is particularly handy when using LinkedIn for sales.
Bonus tips
- Quotation marks ("") are used to search for an exact phrase (e.g., "digital marketing specialist" would only show profiles that include this exact phrase). Bear in mind that only standard straight quotation marks work, while curly, also known as smart aren’t supported.
- Make sure to always capitalize the operators.
- Parentheses () allow you to combine operators for more complex searches. For example, "(sales OR marketing) AND manager NOT assistant" could be used to find profiles that contain either "sales" or "marketing" along with "manager," but exclude any that contain "assistant").
Why this strategy works:
Think of Boolean strings as your secret weapon for supercharging your prospecting. When you fine-tune your search criteria, you’ll cut down on sifting through irrelevant profiles and improve your odds of connecting with promising leads. It’s like having a laser-focused radar for finding the right people!
5. Target Prospects with Similar Interests to Increase Your Network
Shared interests can help you forge deeper connections with your leads and add a personal touch to your interactions.
In this section, we’ll show you how to use LinkedIn Sales Navigator’s “Shared Experience” filter to amplify your networking efforts and build rapport with potential prospects more naturally.
To harness the power of shared experiences, simply navigate to the Best Path In within Sales Navigator. From there, apply the “Shared Experience” filter to uncover prospects who share a common background with you.
When you reach out to prospects who share your background — whether it’s an alma mater, a past gig, or a professional group — it’s like saying, “Hey, I understand where you’re coming from!”
And guess what? Suddenly, your outreach isn’t a cold pitch; it’s more like a warm handshake. You’re not just another stranger, but someone they can relate to.
Why this strategy works:
Well, it’s all about finding that sweet spot — the common ground. These shared experiences can help you bond with your prospects more easily. Trust builds faster, and those cold outreach messages suddenly come across as friendly and not potentially transactional.
6. Creating a Buyer Persona and Leveraging Profile Views in LinkedIn Sales Navigator
This approach to LinkedIn prospecting is low-hanging fruit. Don’t let those who checked you out on the platform but took no further action slip through the cracks! They clearly showed interest and curiosity, so it’s your move.
Create a buyer persona and cross-check it with people who have recently viewed your profile.
Here’s how to use LinkedIn Sales Navigator to do this.
Step #1: Define your ideal customer
Start by outlining the characteristics that define your ideal customer profile (ICP). Consider industry, job function, seniority level, and geographic location.
Step #2: Set up a Persona in LinkedIn Sales Navigator
Go to the “Personas” section on your Sales Navigator homepage. Here, you can add a new persona by clicking “Create new persona +.” Fill in the details that best represent your ICP, from industry specifics to job titles and beyond.
Step #3: Leverage your personas
Once you set up your personas, integrate them into your prospecting routine. You can filter leads using a specific persona, focusing on individuals closely matching your target profile. Personas can also guide you in identifying key decision-makers within targeted accounts, significantly enhancing your sales strategy.
Step #4: Monitor profile views and cross-check them with your personas
Keep a close eye on the “Viewed Your Profile” section.
Explore these visitors’ profiles and compare them against your personas. Look for overlaps in job titles, industries, and other criteria that indicate a match with your ideal customer profile. If profiles align with your personas, reach out.
Why this strategy works:
You can refine your outreach by creating detailed buyer personas, ensuring you engage with the most relevant leads. Identifying and interacting with individuals who have viewed your profile is a prime opportunity to start a dialogue, and use their interests to fuel meaningful conversations.
How to Import LinkedIn Sales Navigator Leads to a Campaign
Thanks to its rich database and advanced filtering, LinkedIn Sales Navigator lets you identify and segment your ideal prospects.
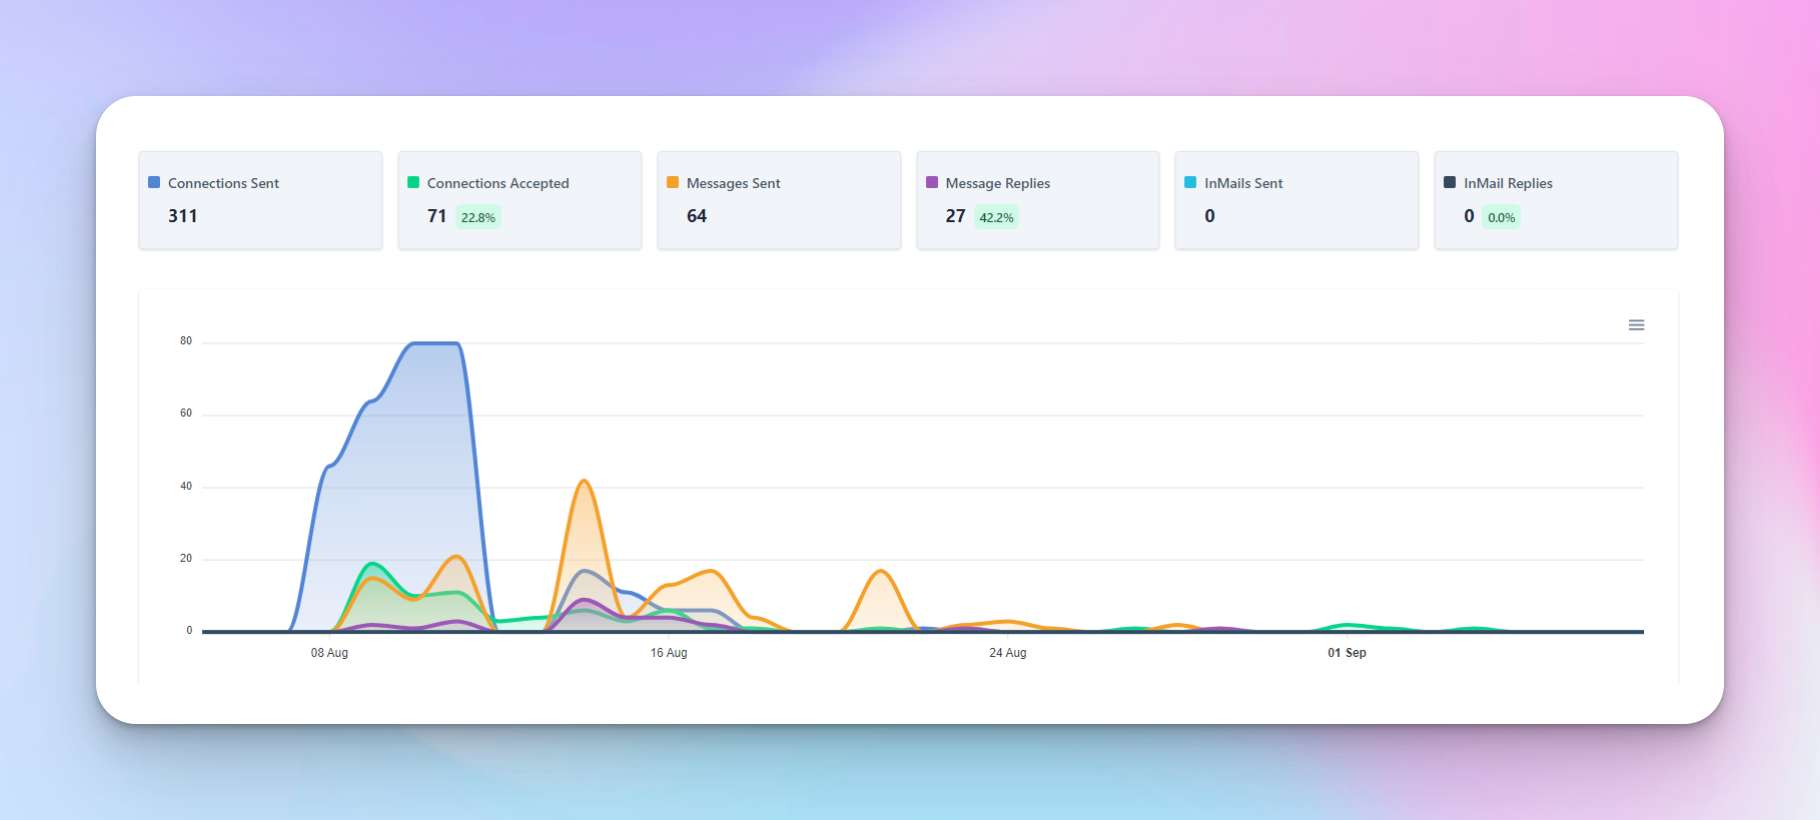
Your next step to a successful campaign is importing these precisely curated leads into an automation tool like HeyReach. It will help you streamline your outreach, target your prospects, and personalize your campaigns. LinkedIn message automation will increase your chances of successful lead generation while saving you time.
Let’s explore how to use LinkedIn Sales Navigator alongside HeyReach to automate your LinkedIn prospecting.
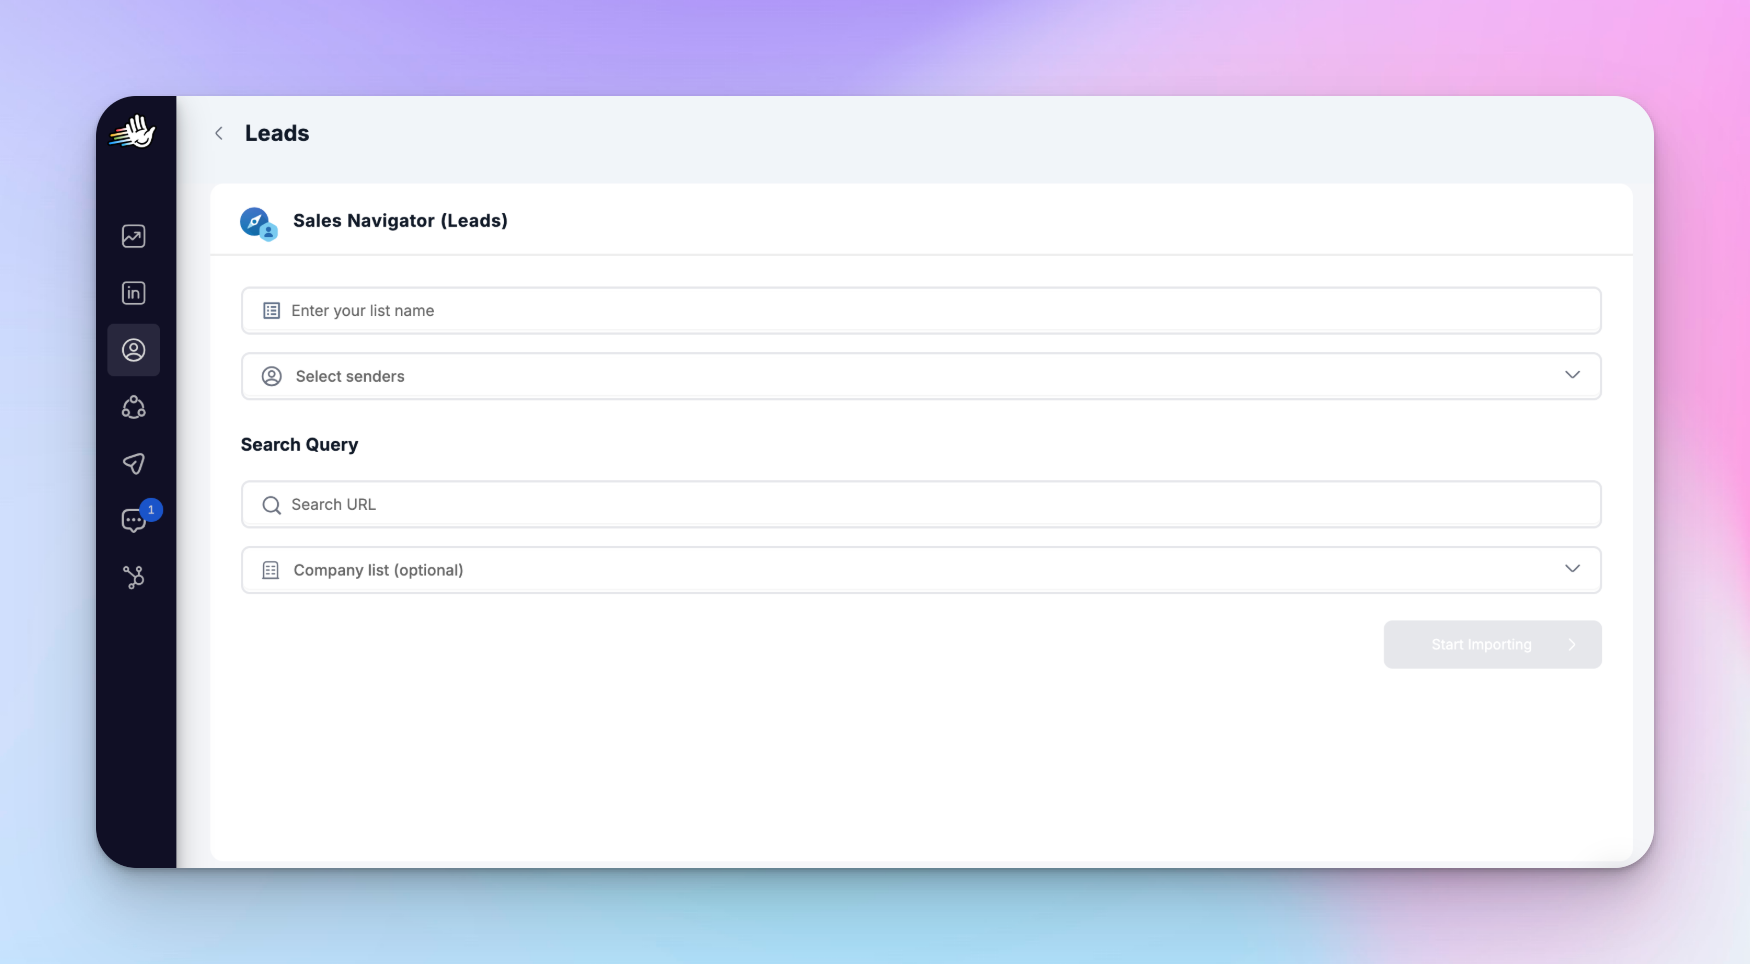
Step #1: Create your prospect list using LinkedIn Sales Navigator
- Use Sales Navigator filters. Use Sales Navigator’s advanced filters, such as activity levels (e.g., “Posted on LinkedIn”), Boolean strings, and shared experiences, to refine your target list
- Import prospects. After finalizing your list in Sales Navigator, copy the URL of your search results. Paste it to HeyReach, name the list, click >Start importing< and you are ready start scheduling outreach campaign.
Step #2: Build your campaign in HeyReach
- Design your outreach strategy. Outline the steps of your campaign, including profile views, connection requests, and follow-up messages. Use creative and personalized templates to engage your prospects effectively.
- Set up campaign sequences. Configure the campaign in HeyReach, specifying actions based on whether prospects accept your connection requests or engage with your messages.
- Launch and monitor. Start your campaign and use HeyReach features to monitor progress, manage replies, and adjust strategies as needed.
Step #3: Analyze and optimize
- Review campaign results. Analyze the campaign’s outcomes, including acceptance and reply rates and the number of qualified leads generated.
- Optimize for future campaigns. Use insights from your campaign performance to refine your approach, targeting criteria, and message templates for future outreach efforts.
🚀 Take action. No more low replies and unqualified leads from LinkedIn outreach. Use HeyReach to automate personalized LinkedIn campaigns at scale. Launch your first campaign for free - no card required.
Is LinkedIn Sales Navigator Worth It?
LinkedIn Sales Navigator is undeniably a go-to tool for sales professionals and businesses focused on maximizing their lead generation and networking on LinkedIn.
Here is a brief summary of what it has to offer.
Overview of features with a subscription
When you subscribe to LinkedIn Sales Navigator, you get access to a suite of specialized features designed to streamline your sales process, such as:
- 25+ Advanced Lead & Company Search Filters. Fine-tune your search with detailed filters such as job title, industry, location, and company size to find your ideal prospects
- Lead recommendations. Receive personalized recommendations to discover potential leads that match your sales preferences
- InMail Messages. Send up to 50 InMail messages monthly to connect directly with prospects outside your network
- Real-time Sales Updates. Get timely notifications about significant events, such as job changes and company updates among your saved leads
- Account Insights. Gain insights into companies’ hiring trends, department sizes, and recent hires to understand your target accounts better
LinkedIn Sales Navigator limits
Sales Navigator goes a long way toward improving your LinkedIn prospecting and lead generation efforts. But to prevent misuse, maintain the quality of interactions on the platform, and ensure optimal performance for all users, it does come with certain limits:
- Profile views. While free LinkedIn users face a limit of 500 profile views per day, Sales Navigator subscribers can view up to 2,000 profiles daily
- Saved leads. You can save up to 10,000 leads across all Sales Navigator plans
- Search results. Sales Navigator allows viewing up to 2,500 lead results across 100 pages or 1,000 account results across 40 pages in search results
Does LinkedIn Sales Navigator have a free trial?
Yes, LinkedIn Sales Navigator offers a free trial for users who have not used any LinkedIn paid subscription or free trial in the last 365 days. This trial allows you to test the platform’s features before committing to a paid version.
If you haven’t signed up for a trial before, you can experience Sales Navigator’s capabilities firsthand, for free.
To start, provide your payment details to set up your Sales Navigator account — so, yes, you do need to provide your credit card number or PayPal. Remember that you can cancel your subscription before the trial ends to avoid any charges.
Once you’re subscribed, use Sales Navigator’s powerful features to enhance your lead generation and sales efforts.
If you find Sales Navigator too complex for your needs, you can check other LinkedIn account types and the benefits of LinkedIn subscriptions.
Why Use LinkedIn Sales Navigator
Incorporating LinkedIn Sales Navigator into your sales strategy can bring you a lot of new professional connections, business opportunities, and sales deals.
To take maximum advantage of this sophisticated product master all the features it offers and integrate it with tools like HeyReach to automate your outreach efforts. This will allow you to connect with a larger audience more efficiently.
Try it for free
Frequently Asked Questions
What is LinkedIn Sales Navigator used for?
Sales Navigator is a LinkedIn tool designed to help you find, target, and engage high-quality leads using advanced search filters, lead recommendations, and real-time insights.
Is LinkedIn Sales Navigator worth it for B2B sales?
Yes, especially for outbound-focused teams. It helps you build highly targeted lead lists, track buyer signals, and reach decision-makers more efficiently than standard LinkedIn search.
What’s the difference between LinkedIn and Sales Navigator?
Regular LinkedIn is for networking. Sales Navigator adds advanced search filters, saved leads/accounts, InMail messaging, and sales-focused insights for prospecting and lead generation.
How do I find leads in Sales Navigator?
You can use filters like job title, industry, company size, geography, seniority, and activity signals (like job changes or recent posts) to build highly targeted prospect lists.
Can I automate LinkedIn Sales Navigator outreach?
Yes, but carefully. Many teams combine Sales Navigator with tools like HeyReach to scale outreach while keeping messages personalized and within LinkedIn limits.